UNIT 2: TECHNICAL DRAWING
- What is technical drawing?. Drawing instruments.
Activity 1. Write this vocabulary in your notebook and learn it by heart.
Activity 2. Click here and read the chapter "¿Qué es el dibujo técnico?". Then, write a brief summary in English in your notebook.
Activity 3. Commercial papers have standardized sizes called formats. Go to slide 3 in the next presentation and draw in your notebook the format A0 (sheet holded by the kids) and its size. Write the sizes of the other formats (from A1 to A5) too.
Activity 4. Read the next presentation, which contains information about the basic drawing instruments.
Activity 5. In your computer, do the following Educaplay activity.
Activity 6. Do the Educaplay activity below, and write the whole text in your notebook.
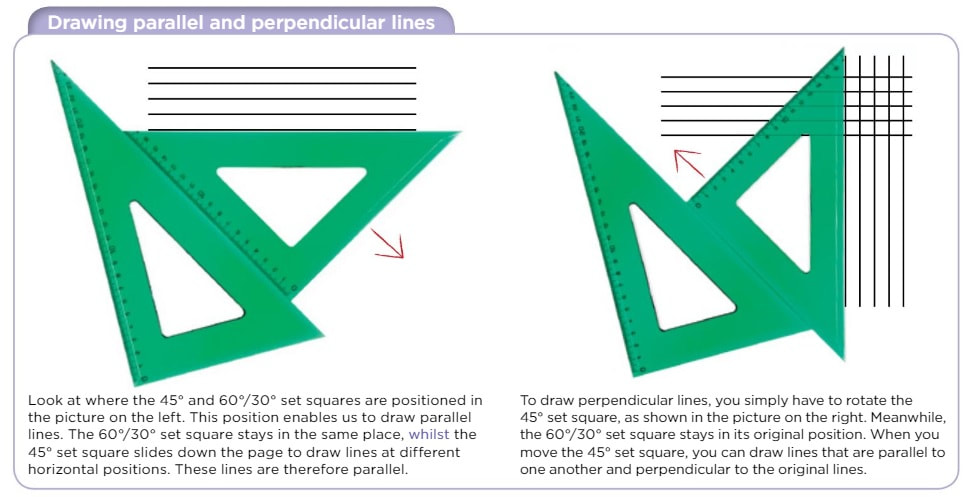
Look at the image below to learn how to to draw parallel and perpendicular lines with the set squares. In case you still don't understand it, click here.
Activity 7. In a sheet of paper, draw this figure using drawing instruments (ruler and the set squares).

- Drawing techniques (I): Views
Activity 8. Write this vocabulary in your notebook and learn it by heart.
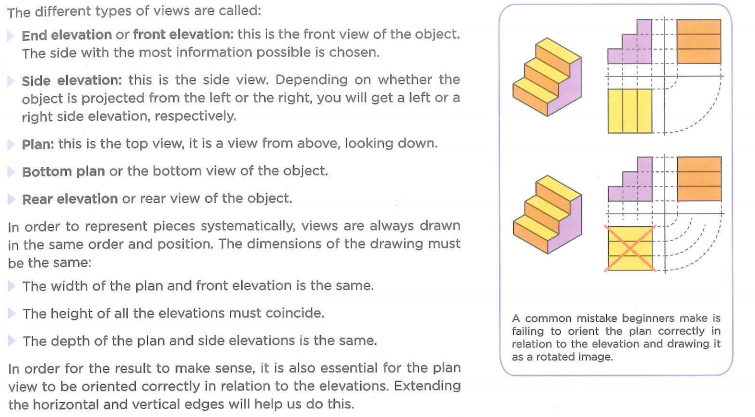
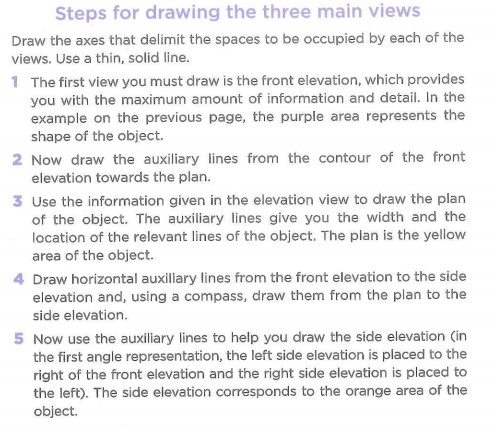
Activity 9. Read the information below about the views and how to draw them. Then, write a scheme in your notebook, as well as the example on the right.
Click here to look at step-by-step exercises of views (source: www.aulataller.es)
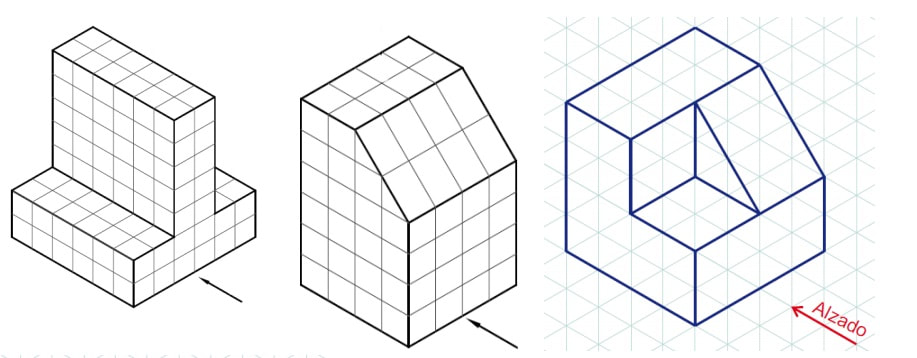
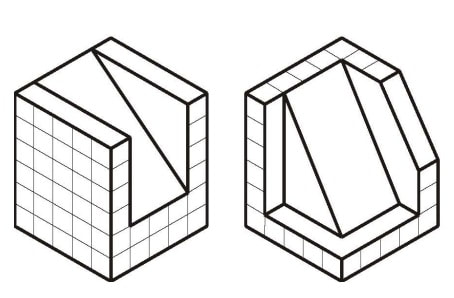
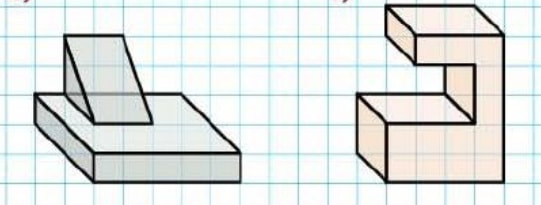
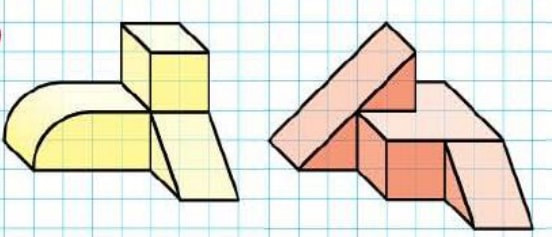
Activity 10. In your notebook, draw the main views of these pieces. Take each square equals to 1 cm.
- Drawing techniques (II): Perspective or 3-D drawing.
In the next presentation (slides 15-17) you have information about perspective in Spanish.
Activity 11. Now, it's time to practice. In your notebook, draw a sketch (freehand drawing) of three pieces (from activity 10) in cabinet perspective and three different in isometric perspective. To draw in cabinet perspective you can use your notebook as grid. And to draw in isometric perspective you can download and print this file:
| plantillaisometrica.pdf |
- Dimensioning
Activity 12. Read these presentations about dimensioning. Then, write a scheme in your notebook with some examples that show the method and the elements to indicate a measure in technical drawing.
Dimensioning from Isabelop
Activity 13. In your notebook, draw and dimension the figures in pages 14-15 of this document:
| ejercicios_dibujo_2º_eso.pdf |
Solution:
| dimensioning_solutions.pdf |
- Drawing techniques (III): drafts, sketches and plans.
Activity 14. Click here to understand the differences between "boceto" (draft or rough sketch), "croquis" (sketch) and "plano" (plan, technical drawing or engineering drawing). Write that differences in your notebook (in English).
The next video shows the differences between every drawing.
The next video shows the differences between every drawing.
Activity 15. In your notebook, draw sketches of 4 objects from the following list: table, chair, car, school bag, sharpener, eraser, handsaw, washing machine, house, smartphone and laptop. You have to draw two of them with their views and the other two with a perspective. Don't forget to incorporate the dimensions correctly. You can find lots of examples on the internet just by typing the key words "sketch+name of the object".
